One of the most important benefits of using SharePoint as an application platform is the ability to use its storagecontainers for storing application data, especially in the form of a list ‐ which is the fundamental data structure in SharePoint.
There are two kinds storage containers inside SharePoint: 1) Administration Store ‐ This store contains data relatedto site administration, containing information such as server farm and node setup, etc. ; and 2) Content Store ‐ Thisstore contains data related to site hierarchy as well as the content associated with the site, including user data ,layout, menu items, etc. The content database is where most application data will tend to reside. The use ofSharePoint storage containers is centered on the notion of list. A list is a collection of items or rows and can be usedto store application data.
Saturday, August 15, 2009
WHAT IS SITE PROVISIONING ?
Site provisioning in MOSS is the process of creating an instance of website/application using the pre-defined site definitions.
While creating an instance, the SP admin will choose a template that are registered in the server farm, (site definitions). In case, the site need to be modified after it has been provisioned,
Features allows change to an existing functionality associated with a provisioned site. Like SiteDefinition, Features is a collection of XML files that, once registered, becomes available to site administrators. A Feature applied at a SPSite scope is automaticallyavailable to all nested SPWebs
WHAT IS SITE DEFINITION IN MOSS ?
Any web application is ultimately a collection of static or dynamically generated web pages. WSS has two core entities, SPWeb and SPSite. An SPWeb entity is acollection of web pages and can be thought of as a sub‐site. A SPSite is a collection of SPWebs. Together SPWeb and SPSite allow the creation of custom web application topologies by defining what is knownas a site definition. It contains a number of SPWebs and how they are nested and other components such as
navigation, contents, custom code etc. Once the template or site definition has been defined and registered, SharePoint administrators can use them to provision sites.
navigation, contents, custom code etc. Once the template or site definition has been defined and registered, SharePoint administrators can use them to provision sites.
WHY MOSS AS AN APPLICATION DEVELOPMENT PLATFORM?
There are two major motivations for choosing MOSS/SharePoint as an application development platform:
- The need to provision more than one website based on a logical grouping ‐ such as department, regionor country ‐ rather than have one website that serves all users.
For example, a company needs to develop a web application for its partners that allow them access to pertinent sales information. The partners may want the sales information to surface differently (i.e. grouped byregions vs. grouped by cities), or they may want to co‐locate additional applications on the same page(i.e. a tax calculator). Rather than building all of this personalization in code, it is easier to provision asite for each partner that is based on a single common site blueprint. Each partner can then customizetheir site based on their specific needs via a single code base. - The need to manage un‐structured content (i.e. documents, web casts, etc.) along with the structureddata stored in a SQL database. A distinction between the structured content and unstructured content is that the former deals with data that can be viewed andmanaged using set‐based groupings (database views), whereas, the latter deals with data that ismanaged as explicit standalone entities along with the associated metadata. Not only is it important tomanage the integrity and security of standalone entities (such as documents); it is also important tomanage the relationships among them (for instance, the association relationship between a documentand structured application data).
Microsoft has introduced platforms/products such WSS and MOSS that build on ASP.NET technology to provide higher‐level building blocks such as the document library and lists, end‐user‐definedforms, search, personalization and workflow.
Wednesday, July 22, 2009
Public sites built on MOSS
Here is the another list of public sites built on MOSS platform
http://www.wssdemo.com/Shared%20Documents/Resources.aspx
http://www.wssdemo.com/Shared%20Documents/Resources.aspx
Tuesday, May 5, 2009
How to send document to record center programatically in MOSS 2007 ?
Here is the code to send document programatically in MOSS 2007. The below code can be used in console/win apps - but in the SharePoint box because of using SharePoint Object Libraries
private void SendDocumentToRecordsCenter()
{
try
{
string MoreInfo= string.Empty
OfficialFileResult Result;
SPSite mySite = new SPSite("http://ServerName");
SPWeb myWeb = mySite.OpenWeb();
SPFile myDoc = myWeb.GetFile("LibreryName/Doc1.docx");
Result =
myDoc.SendToOfficialFile(out MoreInfo);
Console.WriteLine("Result after execution: " + Result);
}
catch (Exception ex)
{
Console.WriteLine("Error - " + ex.ToString());
}
}
Error in MOSS 2007 Record Center Site : "The Record Center is not properly configured for this request"
I have received the error message when i try to push a document from a MOSS site collection to the record center of the server farm.
"The Record Center is not properly configured for this request."
After a hell lot of investigations, i have found that the URL used for configuring the record center in the server farm was wrong.
It should be like
http://< Site DNS or Server Name >/<Record Center Site Name >/_vti_bin/officialfile.asmx
</ SharePointCoder>
Monday, May 4, 2009
Best practice for building SharePoint Solutions
For any SharePoint solution project, I stongly recommend prototyping before writing the complete code. We have been successfull with our prototyping approach. Prototyping helps us to get the user feedback and gives room for more successful delivery of the solution to meet the business requirement.
If we are not able to achieve some functionalities out of the box in SharePoint, we can go for customization using ASP.net code or third party components.
If we are not able to achieve some functionalities out of the box in SharePoint, we can go for customization using ASP.net code or third party components.
How to customize application master page in MOSS 2007
Here is a way how to use the site master page in application pages like settings.aspx in MOSS.
http://superbranding.codeplex.com/
http://superbranding.codeplex.com/
Master Pages and Page Layouts in MOSS 2007
This is worth reading SharePoint Developers...
Approaches to Creating Master Pages and Page Layouts in SharePoint Server 2007
Approaches to Creating Master Pages and Page Layouts in SharePoint Server 2007
Wednesday, April 29, 2009
Announcing Service Pack 2 for Office SharePoint Server 2007 and Windows SharePoint Services 3.0
Service Pack 2 for Office SharePoint Server 2007 and Windows SharePoint Services 3.0 has been released to the Microsoft Download Center. It includes all the fixes prior to SP2, and also several enhancements to improve server farm performance, availability and stability. Plus, a new stsadm operation has been added to help customers prepare for the upgrade to the next version of SharePoint.
Download Links
Service Pack 2 for Windows SharePoint Services 3.0, x86 & x64
http://www.microsoft.com/downloads/details.aspx?FamilyId=79BADA82-C13F-44C1-BDC1-D0447337051B&displaylang=en
Service Pack 2 for Office SharePoint Server 2007, x86 & x64
http://www.microsoft.com/downloads/details.aspx?FamilyId=B7816D90-5FC6-4347-89B0-A80DEB27A082&displaylang=en
Installation Steps
To keep all the files in a SharePoint installation up-to-date, the following packages need to be applied on all servers in the farm. Service Pack 2 contains all fixes released through February of this year, so customers can install it directly on RTM build of the products.
Service Pack 2 for Windows SharePoint Services 3.0
Service Pack 2 for Windows SharePoint Services 3.0 Language Pack (if applicable)
Service Pack 2 for Office SharePoint Server 2007
Service Pack 2 for Office SharePoint Server 2007 Language Pack (if applicable)
After applying the preceding updates, run the SharePoint Products and Technologies Configuration Wizard or "psconfig –cmd upgrade –inplace b2b -wait” in command line. This needs to be done on every server in the farm with SharePoint installed. The version of content databases should be 12.0.0.6421 after successfully applying these updates.
For more in-depth guidance for the update process, we recommend that customers refer to the following articles. These articles provide a correct way to deploy updates, identify known issues (and resolutions), and provide information about creating slipstream builds
Content types in MOSS 2007
Content types are one of the new features in Windows SharePoint Services 3.0. It is same as "Template Object" in Microsoft Content Management Server 2002 (MCMS 2002).
It allows you to store multiple types of data in the same list or document library by data encapsulation. It encapsulates the data scheme and makes it independent of SharePoint list or library.
For examples, you can store contracts of both building and vehicle in the same document library or list in SharePoint although the data schema are different for each one.
For building contract, the columns or data will be - Tenant Name, Building No, Contract Details, etc. and for vehicle contract - Tenant Name, Vehicle Registration No, Tenant License No, Contract Details, etc.
All the two type above documents will reside in the same list or library by defining two content types in WSS 3.0 / MOSS 2007.
Sunday, April 26, 2009
SharePoint 2010 ......
The new version of SharePoint (SharePoint 14) called "SharePoint 2010" is on its way. It has been decided to change the name of the product. Hence there will be no more "MOSS".
Read more here
http://blogs.msdn.com/sharepoint/archive/2009/04/14/microsoft-sharepoint-14-is-now-microsoft-sharepoint-2010.aspx
http://www.microsoft.com/presspass/features/2009/Apr09/04-15Office2010.mspx
Read more here
http://blogs.msdn.com/sharepoint/archive/2009/04/14/microsoft-sharepoint-14-is-now-microsoft-sharepoint-2010.aspx
http://www.microsoft.com/presspass/features/2009/Apr09/04-15Office2010.mspx
How to query SharePoint list data using web service
There are scenarios where we need to extract or query data of SharePoint using some custom code - say in console or winform application.
Here is the sample code and procedure
Add the web reference for the web service in your .net project http:///_vti_bin/Lists.asmx with alias as MyLists
Now use the below code
MyLists.Lists listService = new MyLists.Lists();
listService.Credentials = System.Net.CredentialCache.DefaultNetworkCredentials;
//
listService.Url = "http:///_vti_bin/Lists.asmx";
// Instantiate an XmlDocument object
System.Xml.XmlDocument xmlDoc = new System.Xml.XmlDocument();
//
string listName = "Purchase Orders";
string viewName = "";//blank for default
//
/*Use the CreateElement method of the document object to create elements for the parameters that use XML.*/
XmlElement query = xmlDoc.CreateElement("Query");
XmlElement viewFields = xmlDoc.CreateElement("ViewFields");
XmlElement queryOptions = xmlDoc.CreateElement("QueryOptions");
//
//The below query applies filter "where Field1 = 1"
query.InnerXml = "
"1
//The below string specified which are the fields to be returned in the result
//apart from the default fields
viewFields.InnerXml = "
queryOptions.InnerXml = "FALSE TRUE
//
/* Declare an XmlNode object and initialize it with the XML response from the GetListItems method.
* The last parameter specifies the GUID of the Web site containing the list.
* Setting it to null causes the Web site specified by the Url property to be used.*/
System.Xml.XmlNode nodeListItems = listService.GetListItems(listName, viewName, query, viewFields, rowLimit, queryOptions);
//
DataSet ds = new DataSet();
XmlTextReader myReader = new XmlTextReader(new MemoryStream(ASCIIEncoding.Default.GetBytes(nodeListItems.OuterXml)));
ds.ReadXml(myReader);
Here is the sample code and procedure
Add the web reference for the web service in your .net project http://
Now use the below code
MyLists.Lists listService = new MyLists.Lists();
listService.Credentials = System.Net.CredentialCache.DefaultNetworkCredentials;
//
listService.Url = "http://
// Instantiate an XmlDocument object
System.Xml.XmlDocument xmlDoc = new System.Xml.XmlDocument();
//
string listName = "Purchase Orders";
string viewName = "";//blank for default
//
/*Use the CreateElement method of the document object to create elements for the parameters that use XML.*/
XmlElement query = xmlDoc.CreateElement("Query");
XmlElement viewFields = xmlDoc.CreateElement("ViewFields");
XmlElement queryOptions = xmlDoc.CreateElement("QueryOptions");
//
//The below query applies filter "where Field1 = 1"
query.InnerXml = "
"
//The below string specified which are the fields to be returned in the result
//apart from the default fields
viewFields.InnerXml = "
queryOptions.InnerXml = "
//
/* Declare an XmlNode object and initialize it with the XML response from the GetListItems method.
* The last parameter specifies the GUID of the Web site containing the list.
* Setting it to null causes the Web site specified by the Url property to be used.*/
System.Xml.XmlNode nodeListItems = listService.GetListItems(listName, viewName, query, viewFields, rowLimit, queryOptions);
//
DataSet ds = new DataSet();
XmlTextReader myReader = new XmlTextReader(new MemoryStream(ASCIIEncoding.Default.GetBytes(nodeListItems.OuterXml)));
ds.ReadXml(myReader);
Sunday, April 5, 2009
How to create minimal master page in moss 2007 ?
To create a minimal master page
- Open SharePoint Designer.
- On the File menu, click New, point to SharePoint Content, and then click the Page tab.
- Double-click Master Page to create a new master page.
- Click Design to show the master page in design view. You should see header and left margin areas and several content placeholders in the master page.
- Click Code to show the master page in code view.
- Copy the following code into the master page.
- On the File menu, click Save As, provide a unique file name with the .master extension, and then save the file to the master page gallery (/_catalogs/masterpage) in your site collection.
<%-- Identifies this page as a .master page written in Microsoft Visual C# and registers tag prefixes, namespaces, assemblies, and controls. --%>
<%@ Master language="C#" %>
<!DOCTYPE html PUBLIC "-//W3C//DTD HTML 4.01 Transitional//EN" "http://www.w3.org/TR/html4/loose.dtd">
<%@ Import Namespace="Microsoft.SharePoint" %>
<%@ Register Tagprefix="SPSWC" Namespace="Microsoft.SharePoint.Portal.WebControls" Assembly="Microsoft.SharePoint.Portal, Version=12.0.0.0, Culture=neutral, PublicKeyToken=71e9bce111e9429c" %>
<%@ Register Tagprefix="SharePoint" Namespace="Microsoft.SharePoint.WebControls" Assembly="Microsoft.SharePoint, Version=12.0.0.0, Culture=neutral, PublicKeyToken=71e9bce111e9429c" %>
<%@ Register Tagprefix="WebPartPages" Namespace="Microsoft.SharePoint.WebPartPages" Assembly="Microsoft.SharePoint, Version=12.0.0.0, Culture=neutral, PublicKeyToken=71e9bce111e9429c" %>
<%@ Register Tagprefix="PublishingWebControls" Namespace="Microsoft.SharePoint.Publishing.WebControls" Assembly="Microsoft.SharePoint.Publishing, Version=12.0.0.0, Culture=neutral, PublicKeyToken=71e9bce111e9429c" %>
<%@ Register Tagprefix="PublishingNavigation" Namespace="Microsoft.SharePoint.Publishing.Navigation" Assembly="Microsoft.SharePoint.Publishing, Version=12.0.0.0, Culture=neutral, PublicKeyToken=71e9bce111e9429c" %>
<%@ Register TagPrefix="wssuc" TagName="Welcome" src="~/_controltemplates/Welcome.ascx" %>
<%@ Register TagPrefix="wssuc" TagName="DesignModeConsole" src="~/_controltemplates/DesignModeConsole.ascx" %>
<%@ Register TagPrefix="PublishingVariations" TagName="VariationsLabelMenu" src="~/_controltemplates/VariationsLabelMenu.ascx" %>
<%@ Register Tagprefix="PublishingConsole" TagName="Console" src="~/_controltemplates/PublishingConsole.ascx" %>
<%@ Register TagPrefix="PublishingSiteAction" TagName="SiteActionMenu" src="~/_controltemplates/PublishingActionMenu.ascx" %>
<%-- Uses the Microsoft Office namespace and schema. --%>
<html>
<WebPartPages:SPWebPartManager runat="server"/>
<SharePoint:RobotsMetaTag runat="server"/>
<%-- The head section includes a content placeholder for the page title and links to CSS and ECMAScript (JScript, JavaScript) files that run on the server. --%>
<head runat="server">
<asp:ContentPlaceHolder runat="server" id="head">
<title>
<asp:ContentPlaceHolder id="PlaceHolderPageTitle" runat="server" />
</title>
</asp:ContentPlaceHolder>
<Sharepoint:CssLink runat="server"/>
<asp:ContentPlaceHolder id="PlaceHolderAdditionalPageHead" runat="server" />
</head>
<%-- When loading the body of the .master page, SharePoint Server 2007 also loads the SpBodyOnLoadWrapper class. This class handles .js calls for the master page. --%>
<body onload="javascript:_spBodyOnLoadWrapper();">
<%-- The SPWebPartManager manages all of the Web part controls, functionality, and events that occur on a Web page. --%>
<form runat="server" onsubmit="return _spFormOnSubmitWrapper();">
<wssuc:Welcome id="explitLogout" runat="server"/>
<PublishingSiteAction:SiteActionMenu runat="server"/>
<PublishingWebControls:AuthoringContainer id="authoringcontrols" runat="server">
<PublishingConsole:Console runat="server" />
</PublishingWebControls:AuthoringContainer>
<%-- The PlaceHolderMain content placeholder defines where to place the page content for all the content from the page layout. The page layout can overwrite any content placeholder from the master page. Example: The PlaceHolderLeftNavBar can overwrite the left navigation bar. --%>
<asp:ContentPlaceHolder id="PlaceHolderMain" runat="server" />
<asp:Panel visible="false" runat="server">
<%-- These ContentPlaceHolders ensure all default SharePoint Server pages render with this master page. If the system master page is set to any default master page, the only content placeholders required are those that are overridden by your page layouts. --%>
<asp:ContentPlaceHolder id="PlaceHolderSearchArea" runat="server"/>
<asp:ContentPlaceHolder id="PlaceHolderTitleBreadcrumb" runat="server"/>
<asp:ContentPlaceHolder id="PlaceHolderPageTitleInTitleArea" runat="server"/>
<asp:ContentPlaceHolder id="PlaceHolderLeftNavBar" runat="server"/>
<asp:ContentPlaceHolder ID="PlaceHolderPageImage" runat="server"/>
<asp:ContentPlaceHolder ID="PlaceHolderBodyLeftBorder" runat="server"/>
<asp:ContentPlaceHolder ID="PlaceHolderNavSpacer" runat="server"/>
<asp:ContentPlaceHolder ID="PlaceHolderTitleLeftBorder" runat="server"/>
<asp:ContentPlaceHolder ID="PlaceHolderTitleAreaSeparator" runat="server"/>
<asp:ContentPlaceHolder ID="PlaceHolderMiniConsole" runat="server"/>
<asp:ContentPlaceHolder id="PlaceHolderCalendarNavigator" runat ="server" />
<asp:ContentPlaceHolder id="PlaceHolderLeftActions" runat ="server"/>
<asp:ContentPlaceHolder id="PlaceHolderPageDescription" runat ="server"/>
<asp:ContentPlaceHolder id="PlaceHolderBodyAreaClass" runat ="server"/>
<asp:ContentPlaceHolder id="PlaceHolderTitleAreaClass" runat ="server"/>
<asp:ContentPlaceHolder id="PlaceHolderBodyRightMargin" runat="server" />
</asp:Panel>
</form>
</body>
</html>
Wednesday, January 14, 2009
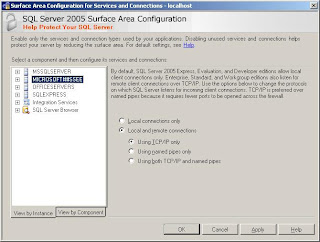
How to find the list of sql server 2005 instances running in a server box
The list of running sql 2k5 running in a server box is made visible by making use of SQL Server Surface Area Configuration Tool.
Here is the screen shot!
Here is the screen shot!
Create and deploy a Custom Feature in Office SharePoint Server 2007
Features are a major enhancement to the template framework of MOSS 2007. It allows you to develop, test, deploy and activate custom functionality in your MOSS environment and provides a way to make the functionality available across your server farm. Examples of features are custom workflows, content types, templates of lists and libraries, etc.
Features are typically stored on the SharePoint server at C:\Program Files\Common Files\Microsoft Shared\web server extensions\12\TEMPLATE\FEATURES. Each features has its own folder and contains a header file called Feature.XML.
The Feature.XML points to a manifest that tells SharePoint where to find the code and XML that defines the feature. It contains the location of assemblies, files, dependencies or properties that support feature. Optionally, the Feature element may point to an XML file that contains an Element which defines the components and types that make up the Feature.
Creating Your Own Custom Feature
For example, i want to create a content type for lists that defines columns for storing informations about RFQ (Request For Quote).
The columns are
-RFQ No.
-Purchase Order No.
-Description
-Vendor
-RFQ Close Date
Although we can create a list template and use it inside the site, creating this content type as a Feature allows Site Administrators to make the type available to all sites in the server farm without adding the content type manually.
To create the list column definition file
1. Create a folder called fieldsRFQ to hold the files defining the feature and elements.
2. Then create the XML file inside the folder that contains the list column definitions. An easy way is duplicate the column definition file of SharePoint itself, which is located at C:\Program Files\Common Files\Microsoft Shared\web server extensions\12\TEMPLATE\FEATURES. You can copy the folder C:\Program Files\Common Files\Microsoft Shared\web server extensions\12\TEMPLATE\FEATURES\fields and rename it with the new name. The folder contains two xml files, feature.xml and fieldswss.xml. I have copied and duplicated the folder with the new name "RFQColumns" and rename the file inside the folder fieldswss.xml as "fieldsrfq.xml.
3. Here is my fieldsrfq.xml, the element file that defines the columns. I have modified the copied file by defining my own column definitions.
<?xml version="1.0" encoding="utf-8"?>
<Elements xmlns="http://schemas.microsoft.com/sharepoint/">
<Field ID="{2ABC0796-E9B5-4288-B8D9-F1A66B87E61C}"
Name="RFQNo"
SourceID="http://schemas.microsoft.com/sharepoint/v3"
StaticName="RFQNo"
Group="RFQ Content Type"
RowOrdinal="0"
Type="Text"
Hidden="FALSE"
DisplayName="RFQ No.">
</Field>
<Field ID="{10F319FD-87EA-413a-9C00-A8EAE1C7E3E3}"
Name="PONo"
SourceID="http://schemas.microsoft.com/sharepoint/v3"
StaticName="PONo"
Group="RFQ Content Type"
RowOrdinal="1"
Type="Text"
Hidden="FALSE"
DisplayName="Purchase Order No.">
</Field>
<Field ID="{DDD9DA23-DFE5-4de6-9D12-5231A8499998}"
Name="Description"
SourceID="http://schemas.microsoft.com/sharepoint/v3"
StaticName="Description"
Group="RFQ Content Type"
RowOrdinal="2"
Type="Text"
Hidden="FALSE"
DisplayName="Description">
</Field>
<Field ID="{0844729B-2146-4593-844E-DB5762BAEAC1}"
Name="Vendor"
SourceID="http://schemas.microsoft.com/sharepoint/v3"
StaticName="Vendor"
Group="RFQ Content Type"
RowOrdinal="3"
Type="Text"
Hidden="FALSE"
DisplayName="Vendor">
</Field>
<Field ID="{AFF26D81-88F9-433b-ACCE-F0C836F62698}"
Name="RFQCloseDate"
SourceID="http://schemas.microsoft.com/sharepoint/v3"
StaticName="RFQCloseDate"
Group="RFQ Content Type"
RowOrdinal="4"
Type="Text"
Hidden="FALSE"
DisplayName="RFQ Close Date">
</Field>
</Elements>
All the attributes in the above file is self explanatory. You have to map the sharepoint native columns against your each columns in the list.
4. Next step is to finalize the feature.xml file and paste it inside the fieldsRFQ folder. The feature XML file will look like this after the moficitation.
<?xml version="1.0" encoding="utf-8"?>
<Feature Id="3313208E-36E6-481e-BCE8-96CA777FF5F1"
Title="Request For Quote (RFQ) Columns"
Description="Installs columns designed to manage RFQ data."
Version="12.0.0.0"
Hidden="FALSE"
Scope="Site"
DefaultResourceFile="core"
xmlns="http://schemas.microsoft.com/sharepoint/">
<ElementManifests>
<ElementManifest Location="fieldsrfq.xml"/>
</ElementManifests>
</Feature>
The following metadata is contained in the element in this XML file.
ID: The GUID that uniquely identifies the Feature. This value must be unique across the server farm. The easiest way to create a GUID is with the guidgen.exe utility that comes with Microsoft Visual Studio.
Title: The name of the Feature. In an actual scenario, you will see the name of the Feature displayed on the Site Features web page inside the Site Settings section for a given SharePoint site.
Description: The description of the Feature.
Version: The version of the Feature. This value can be incremented for successive versions of the Feature.
Scope:Web or Site are the typical values. The scope defines the context in which the Feature can be activated or deactivated. Setting the scope equal to Web means that the Feature can be activated or deactivated within the context of the site. A setting of Site means that the Feature can be activated or deactivated within the scope of a site collection. The scope is set to the site collection displayed to the administrator in the Site Collection Features page. There are also WebApplication and Farm values.
Hidden:TRUE or FALSE are allowable values here. This setting specifies if the Feature is visible in the list of Features on the Site Features web page. Setting the attribute to TRUE makes the Feature visible to users who want to activate it. Hidden Features must be activated either from the command line, in custom code, or through the dependency of another Feature.
DefaultResourceFile: Specifies the central location for settings and other items that may change frequently.
ImageUrl: Points to an image file that will be displayed next to the Feature in the user interface.
element : The container element for elements
element : Contains the location of the manifest file that contains the different elements that this Feature implements. The path to sub-directories and files is a relative path.
5. Now that defining the site columns for the Feature is completed, you need to create 2 files for the Feature content types that specify the components of the Feature. Create a new folder in "ctypesRFQ" folder in the path C:\Program Files\Common Files\Microsoft Shared\web server extensions\12\TEMPLATE\FEATURES. You can create the ctype.xml by duplicating the file ctypeswss.xml from C:\Program Files\Common Files\Microsoft Shared\web server extensions\12\TEMPLATE\FEATURES\ctypes and the feature.xml file format remains the same. Here is my ctypeRFQ.xml.
<?xml version="1.0" encoding="utf-8" ?>
<Elements xmlns="http://schemas.microsoft.com/sharepoint/">
<ContentType ID="0x01001EF379E5-F202-434f-8DA6-3401E94E291E"
Name="RFQ Content Type"
Group="RFQs"
Description="Designed to facilitate the storage of RFQ information."
Version="0">
<FieldRefs>
<FieldRef ID="{2ABC0796-E9B5-4288-B8D9-F1A66B87E61C}" Name="RFQNo" />
<FieldRef ID="{10F319FD-87EA-413a-9C00-A8EAE1C7E3E3}" Name="PONo" />
<FieldRef ID="{DDD9DA23-DFE5-4de6-9D12-5231A8499998}" Name="Description" />
<FieldRef ID="{0844729B-2146-4593-844E-DB5762BAEAC1}" Name="Vendor" />
<FieldRef ID="{AFF26D81-88F9-433b-ACCE-F0C836F62698}" Name="RFQCloseDate" />
</FieldRefs>
</ContentType>
</Elements>
The above ctypeRFQ.xml file details the fields with GUID of the content type involved.
6. Create another file called feature.xml inside the folder ctypesRFQ and paste the code below. Please note the format is similiar to one we created before. A new GUID has to be created for the ID attribute in the file below. Also add the feature id of the content type
(one created before) in the tag as below.
<?xml version="1.0" encoding="utf-8" ?>
<Feature Id="060EB007-9D6C-40c5-ABBE-901171CD04FF"
Title="RFQ Data Content Types"
Description="Installs content types designed to manage information about RFQ."
Version="12.0.0.0"
Hidden="FALSE"
Scope="Site"
DefaultResourceFile="core"
xmlns="http://schemas.microsoft.com/sharepoint/">
<ElementManifests>
<ElementManifest Location="ctypesRFQ.xml" />
</ElementManifests>
<ActivationDependencies>
<!-- Installs the site columns that hold RFQ data -->
<ActivationDependency FeatureId="3313208E-36E6-481e-BCE8-96CA777FF5F1"/>
</ActivationDependencies>
</Feature>
7. Now we are good to go for feature deployment. Open command prompt and type cd "C:\Program Files\Common Files\Microsoft Shared\web server extensions\12\BIN". Now execute the command in below sequence,
a) stsadm –o installfeature –filename fieldsRFQ\feature.xml
b) stsadm –o installfeature –filename ctypesRFQ\feature.xml
8. Now the feature is implemented. Next step is to activate the feature. Execute the following command in sequence below (in the same location)
a) stsadm –o activatefeature –name fieldsRFQ -url "http:\\localhost"
b) stsadm –o activatefeature –name ctypesRFQ -url "http:\\localhost"
where the URL http://localhost should be the top level site collection url where you want to deploy the feature
9. Restart the IIS
Features are typically stored on the SharePoint server at C:\Program Files\Common Files\Microsoft Shared\web server extensions\12\TEMPLATE\FEATURES. Each features has its own folder and contains a header file called Feature.XML.
The Feature.XML points to a manifest that tells SharePoint where to find the code and XML that defines the feature. It contains the location of assemblies, files, dependencies or properties that support feature. Optionally, the Feature element may point to an XML file that contains an Element which defines the components and types that make up the Feature.
Creating Your Own Custom Feature
For example, i want to create a content type for lists that defines columns for storing informations about RFQ (Request For Quote).
The columns are
-RFQ No.
-Purchase Order No.
-Description
-Vendor
-RFQ Close Date
Although we can create a list template and use it inside the site, creating this content type as a Feature allows Site Administrators to make the type available to all sites in the server farm without adding the content type manually.
To create the list column definition file
1. Create a folder called fieldsRFQ to hold the files defining the feature and elements.
2. Then create the XML file inside the folder that contains the list column definitions. An easy way is duplicate the column definition file of SharePoint itself, which is located at C:\Program Files\Common Files\Microsoft Shared\web server extensions\12\TEMPLATE\FEATURES. You can copy the folder C:\Program Files\Common Files\Microsoft Shared\web server extensions\12\TEMPLATE\FEATURES\fields and rename it with the new name. The folder contains two xml files, feature.xml and fieldswss.xml. I have copied and duplicated the folder with the new name "RFQColumns" and rename the file inside the folder fieldswss.xml as "fieldsrfq.xml.
3. Here is my fieldsrfq.xml, the element file that defines the columns. I have modified the copied file by defining my own column definitions.
<?xml version="1.0" encoding="utf-8"?>
<Elements xmlns="http://schemas.microsoft.com/sharepoint/">
<Field ID="{2ABC0796-E9B5-4288-B8D9-F1A66B87E61C}"
Name="RFQNo"
SourceID="http://schemas.microsoft.com/sharepoint/v3"
StaticName="RFQNo"
Group="RFQ Content Type"
RowOrdinal="0"
Type="Text"
Hidden="FALSE"
DisplayName="RFQ No.">
</Field>
<Field ID="{10F319FD-87EA-413a-9C00-A8EAE1C7E3E3}"
Name="PONo"
SourceID="http://schemas.microsoft.com/sharepoint/v3"
StaticName="PONo"
Group="RFQ Content Type"
RowOrdinal="1"
Type="Text"
Hidden="FALSE"
DisplayName="Purchase Order No.">
</Field>
<Field ID="{DDD9DA23-DFE5-4de6-9D12-5231A8499998}"
Name="Description"
SourceID="http://schemas.microsoft.com/sharepoint/v3"
StaticName="Description"
Group="RFQ Content Type"
RowOrdinal="2"
Type="Text"
Hidden="FALSE"
DisplayName="Description">
</Field>
<Field ID="{0844729B-2146-4593-844E-DB5762BAEAC1}"
Name="Vendor"
SourceID="http://schemas.microsoft.com/sharepoint/v3"
StaticName="Vendor"
Group="RFQ Content Type"
RowOrdinal="3"
Type="Text"
Hidden="FALSE"
DisplayName="Vendor">
</Field>
<Field ID="{AFF26D81-88F9-433b-ACCE-F0C836F62698}"
Name="RFQCloseDate"
SourceID="http://schemas.microsoft.com/sharepoint/v3"
StaticName="RFQCloseDate"
Group="RFQ Content Type"
RowOrdinal="4"
Type="Text"
Hidden="FALSE"
DisplayName="RFQ Close Date">
</Field>
</Elements>
All the attributes in the above file is self explanatory. You have to map the sharepoint native columns against your each columns in the list.
4. Next step is to finalize the feature.xml file and paste it inside the fieldsRFQ folder. The feature XML file will look like this after the moficitation.
<?xml version="1.0" encoding="utf-8"?>
<Feature Id="3313208E-36E6-481e-BCE8-96CA777FF5F1"
Title="Request For Quote (RFQ) Columns"
Description="Installs columns designed to manage RFQ data."
Version="12.0.0.0"
Hidden="FALSE"
Scope="Site"
DefaultResourceFile="core"
xmlns="http://schemas.microsoft.com/sharepoint/">
<ElementManifests>
<ElementManifest Location="fieldsrfq.xml"/>
</ElementManifests>
</Feature>
The following metadata is contained in the
ID: The GUID that uniquely identifies the Feature. This value must be unique across the server farm. The easiest way to create a GUID is with the guidgen.exe utility that comes with Microsoft Visual Studio.
Title: The name of the Feature. In an actual scenario, you will see the name of the Feature displayed on the Site Features web page inside the Site Settings section for a given SharePoint site.
Description: The description of the Feature.
Version: The version of the Feature. This value can be incremented for successive versions of the Feature.
Scope:Web or Site are the typical values. The scope defines the context in which the Feature can be activated or deactivated. Setting the scope equal to Web means that the Feature can be activated or deactivated within the context of the site. A setting of Site means that the Feature can be activated or deactivated within the scope of a site collection. The scope is set to the site collection displayed to the administrator in the Site Collection Features page. There are also WebApplication and Farm values.
Hidden:TRUE or FALSE are allowable values here. This setting specifies if the Feature is visible in the list of Features on the Site Features web page. Setting the attribute to TRUE makes the Feature visible to users who want to activate it. Hidden Features must be activated either from the command line, in custom code, or through the dependency of another Feature.
DefaultResourceFile: Specifies the central location for settings and other items that may change frequently.
ImageUrl: Points to an image file that will be displayed next to the Feature in the user interface.
5. Now that defining the site columns for the Feature is completed, you need to create 2 files for the Feature content types that specify the components of the Feature. Create a new folder in "ctypesRFQ" folder in the path C:\Program Files\Common Files\Microsoft Shared\web server extensions\12\TEMPLATE\FEATURES. You can create the ctype.xml by duplicating the file ctypeswss.xml from C:\Program Files\Common Files\Microsoft Shared\web server extensions\12\TEMPLATE\FEATURES\ctypes and the feature.xml file format remains the same. Here is my ctypeRFQ.xml.
<?xml version="1.0" encoding="utf-8" ?>
<Elements xmlns="http://schemas.microsoft.com/sharepoint/">
<ContentType ID="0x01001EF379E5-F202-434f-8DA6-3401E94E291E"
Name="RFQ Content Type"
Group="RFQs"
Description="Designed to facilitate the storage of RFQ information."
Version="0">
<FieldRefs>
<FieldRef ID="{2ABC0796-E9B5-4288-B8D9-F1A66B87E61C}" Name="RFQNo" />
<FieldRef ID="{10F319FD-87EA-413a-9C00-A8EAE1C7E3E3}" Name="PONo" />
<FieldRef ID="{DDD9DA23-DFE5-4de6-9D12-5231A8499998}" Name="Description" />
<FieldRef ID="{0844729B-2146-4593-844E-DB5762BAEAC1}" Name="Vendor" />
<FieldRef ID="{AFF26D81-88F9-433b-ACCE-F0C836F62698}" Name="RFQCloseDate" />
</FieldRefs>
</ContentType>
</Elements>
The above ctypeRFQ.xml file details the fields with GUID of the content type involved.
6. Create another file called feature.xml inside the folder ctypesRFQ and paste the code below. Please note the format is similiar to one we created before. A new GUID has to be created for the ID attribute in the file below. Also add the feature id of the content type
(one created before) in the
<?xml version="1.0" encoding="utf-8" ?>
<Feature Id="060EB007-9D6C-40c5-ABBE-901171CD04FF"
Title="RFQ Data Content Types"
Description="Installs content types designed to manage information about RFQ."
Version="12.0.0.0"
Hidden="FALSE"
Scope="Site"
DefaultResourceFile="core"
xmlns="http://schemas.microsoft.com/sharepoint/">
<ElementManifests>
<ElementManifest Location="ctypesRFQ.xml" />
</ElementManifests>
<ActivationDependencies>
<!-- Installs the site columns that hold RFQ data -->
<ActivationDependency FeatureId="3313208E-36E6-481e-BCE8-96CA777FF5F1"/>
</ActivationDependencies>
</Feature>
7. Now we are good to go for feature deployment. Open command prompt and type cd "C:\Program Files\Common Files\Microsoft Shared\web server extensions\12\BIN". Now execute the command in below sequence,
a) stsadm –o installfeature –filename fieldsRFQ\feature.xml
b) stsadm –o installfeature –filename ctypesRFQ\feature.xml
8. Now the feature is implemented. Next step is to activate the feature. Execute the following command in sequence below (in the same location)
a) stsadm –o activatefeature –name fieldsRFQ -url "http:\\localhost"
b) stsadm –o activatefeature –name ctypesRFQ -url "http:\\localhost"
where the URL http://localhost should be the top level site collection url where you want to deploy the feature
9. Restart the IIS
Tuesday, January 13, 2009
Value does not fall within the expected range while activating feature in MOSS using stsadm tool
While i tried to implement a custom feature in MOSS, i ended up with the error message "Value does not fall within the expected range".
What has happened is i tried the implementation of feature in wrong sequence, and i received message saying the dependendent feature has to be activated first. Thereafter i activated the other one and then tried this later and got the above message.
The solution use the argument -force. And i beleive that the initial activate attempt haults the process halfway and hence we need to force the activation process.
Here is the full command
ststadm.exe -o activatefeature -filename\feature.xml -url "http://localhost" -force
That s it !
What has happened is i tried the implementation of feature in wrong sequence, and i received message saying the dependendent feature has to be activated first. Thereafter i activated the other one and then tried this later and got the above message.
The solution use the argument -force. And i beleive that the initial activate attempt haults the process halfway and hence we need to force the activation process.
Here is the full command
ststadm.exe -o activatefeature -filename
That s it !
Site Columns in Microsft Office SharePoint Server 2007 (MOSS 2007)
Site Column is one of the new features in the new version of SharePoint, MOSS 2007.
A Site Column (SC) is a reusable column definition that can be used in multiple lists across multiple SharePoint sites. This will be required when the organization need to have a consistent site design or components across the lists and libraries. SCs are attached to native column types which are made available in WSS 3.0
For instance, if your organization had a vendor site collection build on MOSS, then all the sub sites would have a common skeleton (data structures in libraries and lists) to capture the data. Defining a site column at the top level will help you to reuse the same columns across mutiple sites within the site collection. Eg:- RFQ (Request For Quote) document library in the vendor subsite in the above site collection . You can defined the columns required to capture the RFQ data and make use of those columns in all subsequent sites.
Again, after creating the site column in the top level site and leveraging it in the site columns in sub sites, any change in the definition of the site column can be reflected in all the sub sites. That is, if you make changes to a site column, you can update all the list columns based on that template. This is done by pushing down the changes you made to the site column. Pushing down is not an all-or-nothing operation: if the push down of changes fails on one list, Windows SharePoint Services continues pushing down the changes to the remaining lists. Windows SharePoint Services returns a list of errors encountered at the end of the push-down operation.
However, deletion of site column will not delete the columns from the lists where it has beeen used.
In other words, SC can be compared to the User Defined Data Types (UDT) in sql server. In SQL, the UDTs are built on native data types available in the server, say int, money, varchar, etc. Similiar to that, SC is built on native column types available in Windows SharePoint Services 3.0.
Wednesday, January 7, 2009
List of public sites built on MOSS2007
Living Prototypes
OBS
SharePoint Solutions/
Tourism Western Australia
Microsoft Flight Simulator Insider
Architecture Forum (Australia) South East Water Limited (by SDM) LivePoint (Partner)
EchoTechnology (by LivePoint)
Migros Glu Mobile Games Virtual TechEd 2007
Alphamosaik (Partner - France, Multilingual)
HedKandi
ShareView.co.uk
CORGI (UK)
speakTECH
Paul Mitchell
Tyler Butler
Microsoft-Oracle
ThreeWill
EmpowerID Demo
Oasys (French)
InfoCision
Ruijin Hospital Group
UCB (Une societe de BNP PARIBAS) Satama Reveu-d-Etudes (French)
Formextern (French) Cegos (Professional Services) (French)
Sharesquared FIFTEEN Guildford Grammar School website by Vivid Group, the first MOSS 2007 site to go live in Australia!
Australian Innovation (2007 Innovation Festival) by Eclipse Group
JTC Corporation (Singapore Government)
APAC SharePoint Conference 2007 by Microsoft Australia and Unique World
AATorque (New Zealand bro)
Wise Woman by CodeAndContent
Komatsu (by UniqueWorld)
Ditributed Logic Platform (Partner)
MyTalk (Southern Cross by HotHouse)
Hawaiin Air
Performance Food Group (by Dominion Digital)
Plymouth Hospitals NHS Trust (AA Compliant)
Direct Energy
McGrathNicol (by Dimension Data)
cScape Games for Windows
WesternAustralia.com
Subscribe to:
Posts (Atom)